介绍
之前在使用 Vuepress 构建静态站点时配置了 GitHub Actions 来实现 CI 流程,现在准备配置到 Hexo Blog 上实现提交分支代码自动部署到 GitHub Page 中。
准备工作
Git 仓库
准备以下两个仓库
- Blog 仓库用来存放 Hexo 项目
- GitHub Page 仓库用来展示静态博客
生成公钥私钥
这里在之前配置 SSH 时已经处理完毕,操作步骤也比较简单,在任意文件夹打开 Git Bash 后输入以下指令:
|
cd ~/.ssh
ssh-keygen -t rsa -C "邮箱账户"
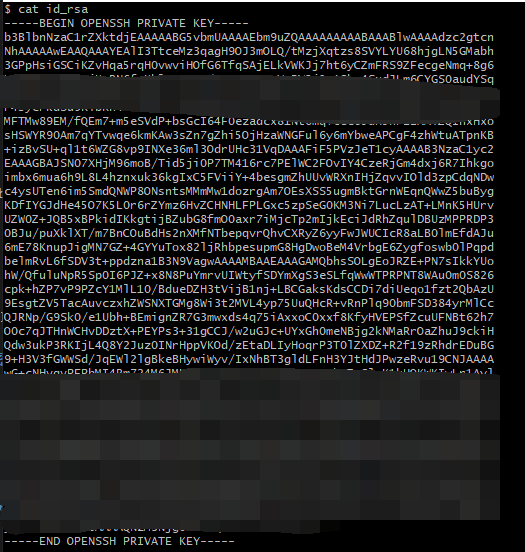
cat id_rsa.pub
cat id_rsa
|
根据以上指令获取到公钥和私钥,私钥配置在 GitHub -> Setting -> SSH and GPG keys -> New SSH Key,配置完成后即可在本机使用 SSH clone Git 项目。
大部分情况下国内使用 HTTPS 链接 clone 会出现超时情况,改为使用 SSH 会解决这个问题。
配置部署密钥
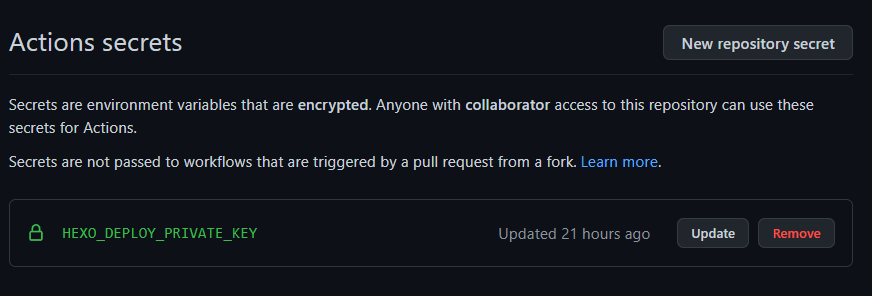
复制公钥部分信息,如下图所示,配置在 Blog 仓库 Setting -> Secrets -> Actions -> New repository secret,创建名称为 HEXO_DEPLOY_PRIVATE_KEY。
编辑 GitHub Actions
在 Blog 仓库 Actions 中点击 New workflow,选择 Simple workflow 后粘贴以下内容并创建。
1
2
3
4
5
6
7
8
9
10
11
12
13
14
15
16
17
18
19
20
21
22
23
24
25
26
27
28
29
30
31
32
33
34
35
36
37
38
39
40
41
42
43
44
45
46
47
48
49
50
51
52
53
54
55
56
57
58
59
60
61
62
63
64
65
66
67
68
69
70
71
72
73
74
75
76
77
| name: CI
on:
push:
branches: [master]
workflow_dispatch:
env:
GIT_USER: 用户名
GIT_EMAIL: 邮箱地址
THEME_REPO: fluid-dev/hexo-theme-fluid
THEME_BRANCH: master
DEPLOY_REPO: GitHub Page 仓库
DEPLOY_BRANCH: master
jobs:
build:
name: Build on node ${{ matrix.node_version }} and ${{ matrix.os }}
runs-on: ubuntu-latest
strategy:
matrix:
os: [ubuntu-latest]
node_version: [12.x]
steps:
- name: Checkout
uses: actions/checkout@v2
- name: Checkout theme repo
uses: actions/checkout@v2
with:
repository: ${{ env.THEME_REPO }}
ref: ${{ env.THEME_BRANCH }}
path: themes/concise
- name: Checkout deploy repo
uses: actions/checkout@v2
with:
repository: ${{ env.DEPLOY_REPO }}
ref: ${{ env.DEPLOY_BRANCH }}
path: .deploy_git
- name: Use Node.js ${{ matrix.node_version }}
uses: actions/setup-node@v1
with:
node-version: ${{ matrix.node_version }}
- name: Configuration environment
env:
HEXO_DEPLOY_PRI: ${{secrets.HEXO_DEPLOY_PRIVATE_KEY}}
run: |
sudo timedatectl set-timezone "Asia/Shanghai"
mkdir -p ~/.ssh/
echo "$HEXO_DEPLOY_PRI" > ~/.ssh/id_rsa
chmod 600 ~/.ssh/id_rsa
ssh-keyscan github.com >> ~/.ssh/known_hosts
git config --global user.name $GIT_USER
git config --global user.email $GIT_EMAIL
cp _config.fluid.yml themes/concise/_config.yml
- name: Install dependencies
run: |
npm install
- name: Deploy hexo
run: |
npm run deploy
|
该操作会在仓库 .github/workflows/ 下创建一个 .yml 文件,GitHub Actions 会根据该文件内的配置进行自动化流程。
最终目录结构如下:
1
2
3
4
5
| blog (repository)
├── _config.fluid.yml
└── .github
└── workflows
└── CI.yml
|
其中 _config.fluid.yml 是我正在使用的 Hexo 主题配置文件,如果你使用了其他主题,可以将 .yml 文件里的 _config.fluid.yml 替换成其他主题的配置文件名。
如果需要了解更多可查阅官方文档 GitHub Actions,也可以阅读阮一峰老师的博客 GitHub Actions 入门教程。
测试
配置成功后,提交代码,在 Blog 仓库 Actions 中可以看到每次提交的部署情况。
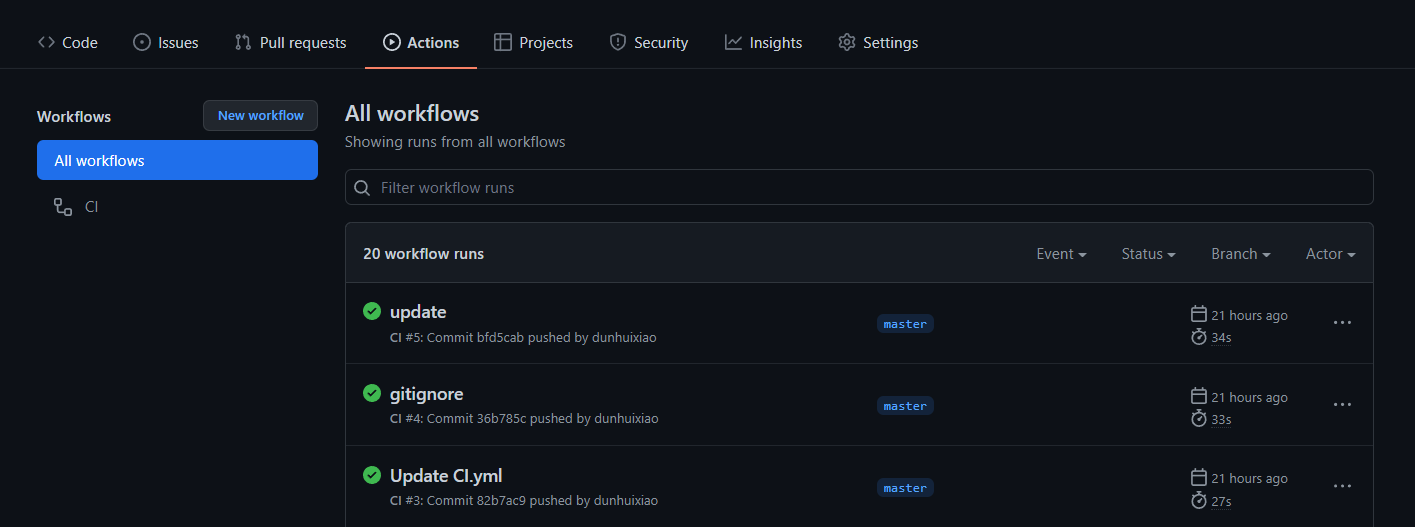
在 CI 执行完毕后,查阅 GitHub Page 仓库,可以看到静态文件已经被更新,本次提交的 .md 文档成功发布至网站。